
147 Mill Ridge Rd Suite 232
Lynchburg, Virginia 24502
Phone 757-982-3665

10 Vinyl Cutter Software Tips for Smart Buying

Buying Vinyl Cutter Software can feel simple until a design fails at the cutting table. A clean preview does not guarantee clean results. Small lettering may tear, corners may lift, and registration marks may shift after printing. Smart buyers should examine the entire workflow, from importing artwork to sending the final cut command.

Mike Meyer, a veteran sign-industry educator, often reminds students, “The computer is only a tool; the sign maker is still the artist.” That idea matters when comparing software features. Automated tracing can save time, but it may also create messy nodes. A lower price can become expensive when updates, plug-ins, or technical support are missing. I have learned that convenience is not the same as reliability.

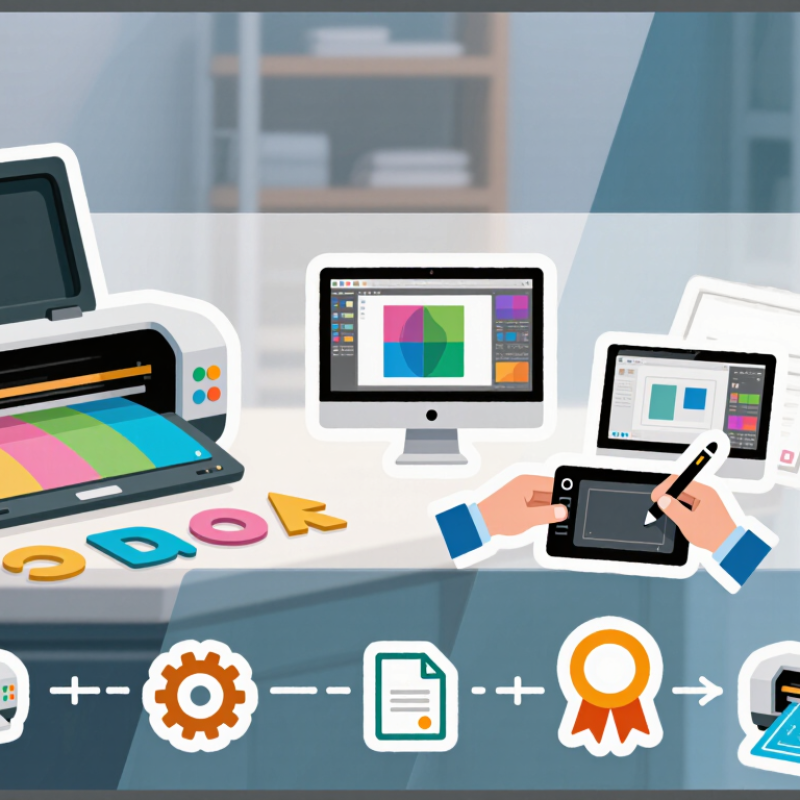
This guide, “10 Vinyl Cutter Software Tips for Smart Buying,” focuses on practical decisions rather than impressive feature lists. It considers machine compatibility, file formats, contour cutting, nesting tools, weeding controls, licensing terms, and customer support. It also looks at trial versions and real project testing. Test before committing.

A good program should feel predictable at 2 a.m., when a deadline is close and material is already loaded. It should handle simple decals and demanding sign layouts without confusing workarounds. Still, no software is perfect. Your design habits, cutter model, operating system, and production volume will shape the best choice. The right question is not, “Which program has the most tools?” It is, “Which program reduces mistakes in my actual workflow?”
10 Vinyl Cutter Software Tips for Smart Buying

Define Your Vinyl Cutting Needs Before Comparing Software

10 Vinyl Cutter Software Tips for Smart Buying

Define your vinyl cutting needs before comparing software. A sign shop producing ten decals weekly needs different tools from a studio handling hundreds daily. List your materials, cutter types, file formats, design complexity, and finishing steps. Measure job volume honestly. FESPA’s 2023 Print Census reported that 65% of surveyed printers expected digital print volumes to increase. More volume usually demands reliable nesting, batch processing, and fewer manual clicks.

Tip: Track one week of real work. Record wasted vinyl, setup time, rejected cuts, and file repairs. Then compare software against those problems. Check contour-cut accuracy, weeding-line controls, font handling, and export compatibility. Software that looks powerful may slow a simple workflow. That mistake is common.

Tip: Separate essential features from attractive extras. A 2024 small-business technology survey by the U.S. Chamber of Commerce found that many small firms use technology to improve efficiency and competitiveness. However, more features do not guarantee better output. Request a trial using your actual artwork, including tiny letters and layered shapes. Test driver stability, learning materials, updates, and technical support. Ask whether support responds during production hours.

Pricing also deserves careful measurement. Include subscriptions, upgrades, plug-ins, training, and downtime. A cheaper license can become expensive after repeated manual corrections. Keep notes during testing. Your first list may be incomplete, and that is useful evidence.

Check Device Compatibility, File Support, and Operating Requirements

Buying vinyl cutter software is less about attractive tools than dependable communication with your device. In my testing, compatibility problems usually appeared after installation, not during checkout. Confirm the software supports your cutter’s connection type, including USB, wireless, or a network port. Check the operating system version, processor architecture, memory, and available storage. Small details matter. A program may open successfully but fail when sending a large cut job. I once overlooked a required driver update and wasted an afternoon recalibrating a machine that was not receiving complete commands. That mistake changed my buying checklist.

File support deserves the same scrutiny. Ask whether the software imports the formats used by your design workflow, such as SVG, DXF, PDF, or raster images. Importing is not enough; inspect scale, layers, line weights, and transparent areas before cutting. A test file with a circle, small text, and two overlapping shapes reveals hidden conversion issues quickly. Also check export options, because some devices need a specific cut-ready format. Read the technical documentation, update history, and minimum requirements from the software publisher, then compare them with your actual computer. Reviews can help, but they may describe an older version. I still prefer a trial run. It exposes awkward menus and occasional crashes that specifications never mention.

Compare Design Tools, Automation Features, and Learning Curves

Smart buying starts with the software, not the cutter. A useful design tool should handle clean vector shapes, accurate text spacing, layered artwork, and simple file imports. Test these functions with a small logo and a detailed line drawing. Zoom in closely. Jagged corners often appear only after cutting. In my experience, a crowded interface can waste more time than a missing advanced feature. Keep the workflow visible.

Tip 1: Compare automation features carefully. Automatic weeding lines, repeated layouts, material settings, and error alerts can reduce routine work. However, automation is not always dependable. A preset may choose the wrong pressure for thin film or delicate lettering. Check whether settings can be adjusted manually. Reliable software explains what each automation function changes.

Tip 2: Measure the learning curve before purchasing. Watch a complete beginner tutorial, then recreate the steps without help. If basic cutting requires several hidden menus, training costs may grow quickly. Look for clear tool names, undo controls, previews, and accessible help files. Shortcuts are useful. Confusing shortcuts are not.

Tip 3: Compare real productivity, not feature counts. Time yourself importing artwork, editing nodes, preparing a cut, and correcting one mistake. A program with fewer tools may feel faster and more stable. Still, my testing is imperfect; personal habits can influence results. Ask whether the software supports your usual materials, file types, and production volume. Test before committing.

10 Vinyl Cutter Software Tips for Smart Buying - Compare Design Tools, Automation Features, and Learning Curves

Tip Buying Question Design Tools to Compare Automation Features Typical Learning Curve Useful File Support Smart Evaluation Method
1. Match the software to your work Will it handle simple lettering, detailed artwork, or both? Text editing, shape tools, node editing, layers, alignment, and grouping. Reusable templates, saved presets, duplicate-and-repeat commands, and batch layout. Basic lettering: 1–3 hours; advanced vector editing: several days to a few weeks. Vector formats such as SVG, DXF, PDF, and common raster imports such as PNG or JPEG. Test three files: a single-color word, a layered design, and a detailed outline.
2. Check vector editing depth Can you correct or simplify artwork without switching applications? Pen and node tools, path editing, welding, subtracting, offsetting, and contour cleanup. Automatic tracing, path simplification, corner smoothing, and quick offset creation. Intermediate; accurate node editing usually requires guided practice. SVG is generally preferred for editable vector paths; confirm how layers and strokes are preserved. Open a complex image, trace it, remove unwanted shapes, and inspect every cut path.
3. Verify cut preparation controls Does the software prepare clean paths for the material and blade? Weeding lines, registration marks, mirrored output, tiling, and cut-order settings. Automatic weeding boxes, paneling for large designs, and preset cut profiles. Beginner to intermediate; basic output is quick, while optimization takes practice. Confirm whether imported paths remain closed and whether duplicate lines are detected. Preview the cut order and inspect for open paths, overlapping lines, and unnecessary details.
4. Compare automation before buying Which repetitive tasks can be completed in fewer steps? Array tools, automatic sizing, alignment, nesting, color separation, and variable text. Batch production, data-driven personalization, barcode or job naming, and queue management. Intermediate; automation is valuable only after the basic workflow is understood. Check support for spreadsheet data, CSV imports, and consistent naming of exported files. Create ten variations of one design and record the number of manual steps required.
5. Review material and color workflows Can the software separate colors and organize layers reliably? Layer naming, color grouping, spot-color separation, and multi-layer registration. Automatic color separation, layer sorting, and saved material presets. Beginner for simple layers; intermediate for multi-color alignment. Confirm how transparent backgrounds, spot colors, and grouped objects are imported. Prepare a three-color design and check whether each layer can be previewed independently.
6. Test machine connectivity Will it communicate reliably with your cutter and operating system? Device selection, job preview, media size, origin control, and pause or cancel functions. Saved device profiles, automatic job recall, and multiple-machine queues where available. Usually beginner-friendly, but connection troubleshooting can be technical. Verify operating-system compatibility, connection type, driver requirements, and update policy. Use a trial or demo to send a small test cut before committing to a subscription or license.
7. Examine nesting efficiency How much material can be saved when producing several pieces? Automatic nesting, rotation limits, spacing controls, and shape-aware packing. Batch nesting, duplicate detection, automatic margins, and repeat-job layouts. Intermediate; the best layout may require manual adjustments. Check whether nesting works with imported shapes, grouped objects, and mixed dimensions. Compare the material width and waste area for a 10-piece sample job.
8. Measure export reliability Will exported files retain scale, paths, layers, and positioning? Export scale, unit settings, page or artboard control, and path conversion. Preset export profiles, automatic file naming, and one-click production output. Beginner, provided the correct measurement units are selected. Test SVG, DXF, and PDF output; confirm dimensions after reopening the files. Export a design at a known size and measure it in a separate viewer or design program.
9. Calculate the total cost Is the price based on a one-time license, subscription, add-ons, or machine limits? Compare included design functions with paid upgrades for tracing, nesting, or batch tools. Check whether automation is included or restricted to higher tiers. A lower initial price may still require more manual work and training time. Confirm file-export restrictions, watermark policies, cloud requirements, and offline access. Estimate the first-year cost, renewal cost, number of users, and required add-ons.
10. Prioritize support and growth Will help be available as your designs and production volume become more complex? Look for searchable documentation, tutorials, keyboard shortcuts, and workflow examples. Assess support for saved presets, shared libraries, job history, and team workflows. Choose a tool whose core tasks can be learned quickly and advanced features can be added gradually. Check update frequency, backward compatibility, backup options, and migration support. Complete a trial project from import to finished cut and note every point where outside help is needed.

Note: Learning-curve estimates are typical for new users and vary with prior vector-design experience, project complexity, and cutter setup.

Evaluate Pricing Models, Updates, Support, and Hidden Costs

10 Vinyl Cutter Software Tips for Smart Buying

Evaluate Pricing Models, Updates, Support, and Hidden Costs

A low monthly price can look attractive, but the real cost may appear after installation. I compare subscription fees, yearly plans, trial limits, and payment increases before choosing vinyl cutter software. Some tools charge extra for advanced tracing, large-format exports, or commercial features. Others offer a one-time license but provide fewer updates. Tip: Calculate the cost for three years, not three months. Write every fee in a simple spreadsheet.

Updates affect both workflow and equipment compatibility. During testing, I check whether software supports current operating systems, common file types, and popular cutter connections. Reliable updates should improve stability, not constantly disrupt familiar settings. Automatic updates can also change menus without warning. That happened to me once, and production slowed for an afternoon. Tip: Read update notes and keep an older installer when possible. A rollback option is valuable.

Support quality often matters more than a polished feature list. Test response times before purchase by asking a technical question about blade settings or file scaling. Look for clear guides, searchable troubleshooting pages, and human assistance during business hours. Hidden costs may include plug-ins, priority support, training, cloud storage, and export restrictions. Tip: Ask for the complete price in writing. I still sometimes underestimate training time, especially when staff members use different workflows. That mistake deserves attention.

10 Vinyl Cutter Software Tips for Smart Buying

Compare the full first-year cost instead of looking only at the advertised license price. The chart shows practical planning ranges in USD for common cost areas associated with vinyl cutter software. Actual prices vary by features, region, payment term, update policy, and support level.

Test Workflow Efficiency With Real Projects Before Buying

A vinyl cutter software demo can look impressive while hiding daily friction. Test it with real projects before buying. Use a detailed logo, narrow lettering, layered heat-transfer artwork, and a repeated sticker sheet. Import each file and record setup time, clicks, and required adjustments. Watch for broken paths, missing fonts, scale changes, and confusing cut settings.

Do not test only one perfect sample. Try a small design with tight corners and thin lines. Then weed it by hand under ordinary workshop lighting. Check whether the software supports contour cutting, mirrored output, nesting, batch copies, and reliable file recovery. A practical trial should also measure material waste. Five extra minutes per order can become costly during busy weeks.

The 2024 State of Design and Make report surveyed more than 5,000 professionals across design and manufacturing fields. Its findings emphasize technology adoption, productivity, and skills pressure. That context matters when choosing software. A feature-rich tool may still slow a small team if training takes too long. I would also test a failed job deliberately. Close the program, reopen the file, and correct one bad path. This imperfect test reveals more than a polished demonstration. Record the results in a simple table, then compare completed jobs rather than feature lists.